Setting up a Project Poseidon Plugin: Difference between revisions
Jump to navigation
Jump to search
m (Added a link to the Project Poseidon page.) |
mNo edit summary |
||
| (3 intermediate revisions by 2 users not shown) | |||
| Line 1: | Line 1: | ||
[[Category:Guides]] | [[Category:Server internals]] [[Category:Guides]] [[Category:Developing]] | ||
{{notice|Before following this guide, make sure you have a Java IDE installed which supports creating Maven projects. It is also recommended to use a Java 8 OpenJDK build. | {{notice|Before following this guide, make sure you have a Java IDE installed which supports creating Maven projects. It is also recommended to use a Java 8 OpenJDK build. | ||
{{user|zavdav}} will be using IntelliJ IDEA and the Azul Zulu OpenJDK build for this guide.}} | {{user|zavdav}} will be using [https://www.jetbrains.com/idea/ IntelliJ IDEA] and the [https://www.azul.com/downloads/ Azul Zulu OpenJDK] build for this guide. <br><br> | ||
You can also use the pre-made [https://github.com/project-poseidon-plugin-devs/project-poseidon-plugin-template template], which includes instructions on how to set it up.}} | |||
# Open your IDE and create a new Maven project | # Open your IDE and create a new Maven project | ||
Latest revision as of 06:55, 31 December 2025
ℹ️ Notice: Before following this guide, make sure you have a Java IDE installed which supports creating Maven projects. It is also recommended to use a Java 8 OpenJDK build.
 zavdav will be using IntelliJ IDEA and the Azul Zulu OpenJDK build for this guide.
You can also use the pre-made template, which includes instructions on how to set it up.
- Open your IDE and create a new Maven project
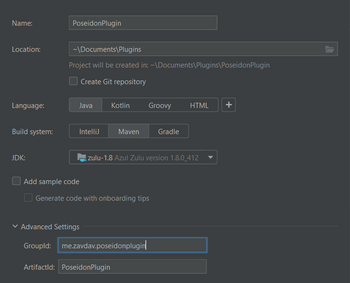
- When creating a project, choose a Group ID. In most cases, it should look like this:
me.yourname.pluginname
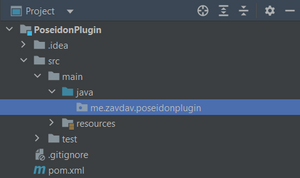
For more information, go to https://docs.oracle.com/javase/tutorial/java/package/namingpkgs.html - After creating the project, your project structure should look like this:
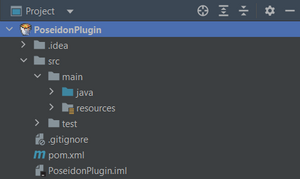
- Go into the
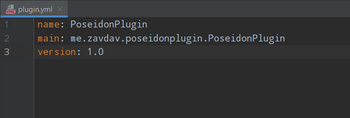
src/main/resourcesdirectory and create a new file calledplugin.yml - In
plugin.yml, insert these values:- name: The name of the plugin
- main: The main class of the plugin (has to inherit
org.bukkit.plugin.java.JavaPlugin) - version: The version of the plugin
- In the
src/main/javadirectory, create a new package with the same name as your Group ID. - In this package, create a new class with the same name as specified in
plugin.yml. - Open the file called
pom.xmland paste the following text into the file:
<?xml version="1.0" encoding="UTF-8" ?>
<project xmlns="http://maven.apache.org/POM/4.0.0"
         xmlns:xsi="http://www.w3.org/2001/XMLSchema-instance"
         xsi:schemaLocation="http://maven.apache.org/POM/4.0.0 http://maven.apache.org/xsd/maven-4.0.0.xsd">

    <modelVersion>4.0.0</modelVersion>
    <groupId>me.yourname.pluginname</groupId>
    <artifactId>ProjectName</artifactId>
    <version>1.0</version>
    <packaging>jar</packaging>

    <name>PluginName</name>

    <properties>
        <java.version>1.8</java.version>
        <project.build.sourceEncoding>UTF-8</project.build.sourceEncoding>
    </properties>

    <repositories>
        <repository>
            <id>johnymuffin-nexus-releases</id>
            <url>https://repository.johnymuffin.com/repository/maven-public/</url>
            <releases>
                <enabled>true</enabled>
            </releases>
            <snapshots>
                <enabled>false</enabled>
            </snapshots>
        </repository>
    </repositories>

    <build>
        <plugins>
            <plugin>
                <groupId>org.apache.maven.plugins</groupId>
                <artifactId>maven-compiler-plugin</artifactId>
                <version>3.11.0</version>
                <configuration>
                    <source>1.8</source>
                    <target>1.8</target>
                </configuration>
            </plugin>
        </plugins>
        <resources>
            <resource>
                <directory>src/main/resources</directory>
                <filtering>true</filtering>
            </resource>
        </resources>
    </build>

    <dependencies>
        <dependency>
            <groupId>com.legacyminecraft.poseidon</groupId>
            <artifactId>poseidon-craftbukkit</artifactId>
            <version>1.1.8</version>
        </dependency>
    </dependencies>

</project>
- This will tell Maven to use the source files from the Project Poseidon repository when compiling and to compile the plugin in Java 8.
Make sure to replace the values in<groupId>,<artifactId>and<name>according to your project structure.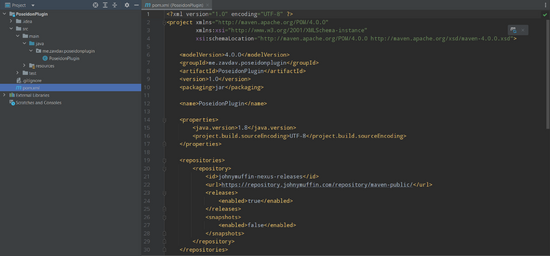
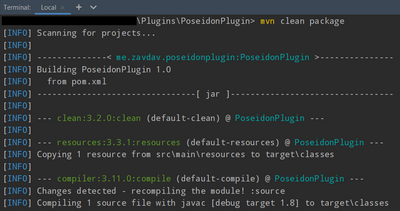
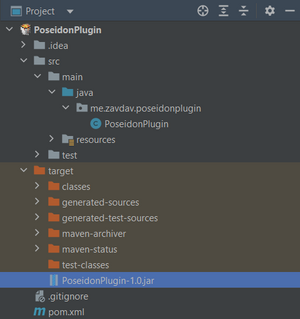
- Go into your IDE's terminal and run
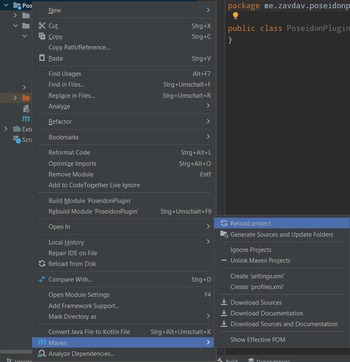
mvn clean package - Reload your Maven project
- Write some code
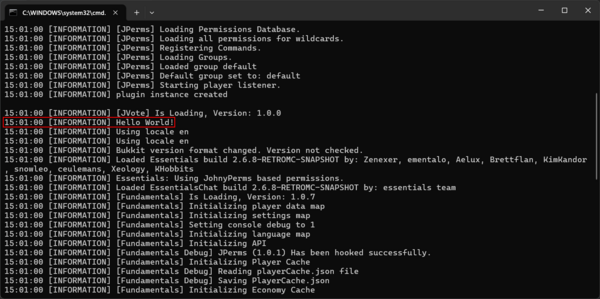
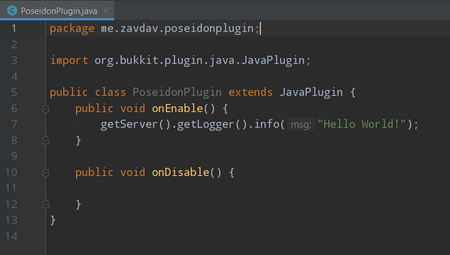
- For demonstration purposes,
 zavdav has added a simple "Hello World!" message that will be displayed in the server console.
- For demonstration purposes,
- Run
mvn clean packagein the terminal - Copy the jar file into the
pluginsfolder of your Project Poseidon server.
Upon starting the server, the "Hello World!" message can be seen in the server console.
